🚀Devops Project : Mastering Docker Swarm for Seamless Web Application Deployment🔧
Welcome to Day 83 of the #90DaysOfDevOps Challenge. Today’s project takes us on an exciting journey of deploying a web application with Docker Swarm. This powerful orchestration tool empowers us to manage containers at scale, ensuring robustness and high performance for our applications. Let’s get started!
Project Description
In this project, we will explore the deployment of a web application using Docker Swarm, a powerful container orchestration tool. Docker Swarm enables the seamless management and scaling of containerized applications, making it an ideal choice for production environments. Leveraging Docker Swarm’s features, such as load balancing, rolling updates, and service discovery, we aim to achieve high availability and reliability for our web application.
The key steps involved in this project include pulling an existing Docker image from DockerHub and deploying it onto a Docker Swarm cluster. By setting up the Swarm cluster, we will benefit from automated failover, load balancing, and horizontal scaling capabilities, ensuring our application can efficiently handle varying workloads and demands.
Let’s dive into the project and learn how Docker Swarm can enhance the deployment and management of containerized applications.
Hands-on Project: Web Application Deployment Using Docker Swarm
In this hands-on project, we will guide you through the process of deploying a web application using Docker Swarm, a powerful container orchestration tool. Before we begin, make sure you have a Docker image of your web application stored on DockerHub.
Pre-requisites:
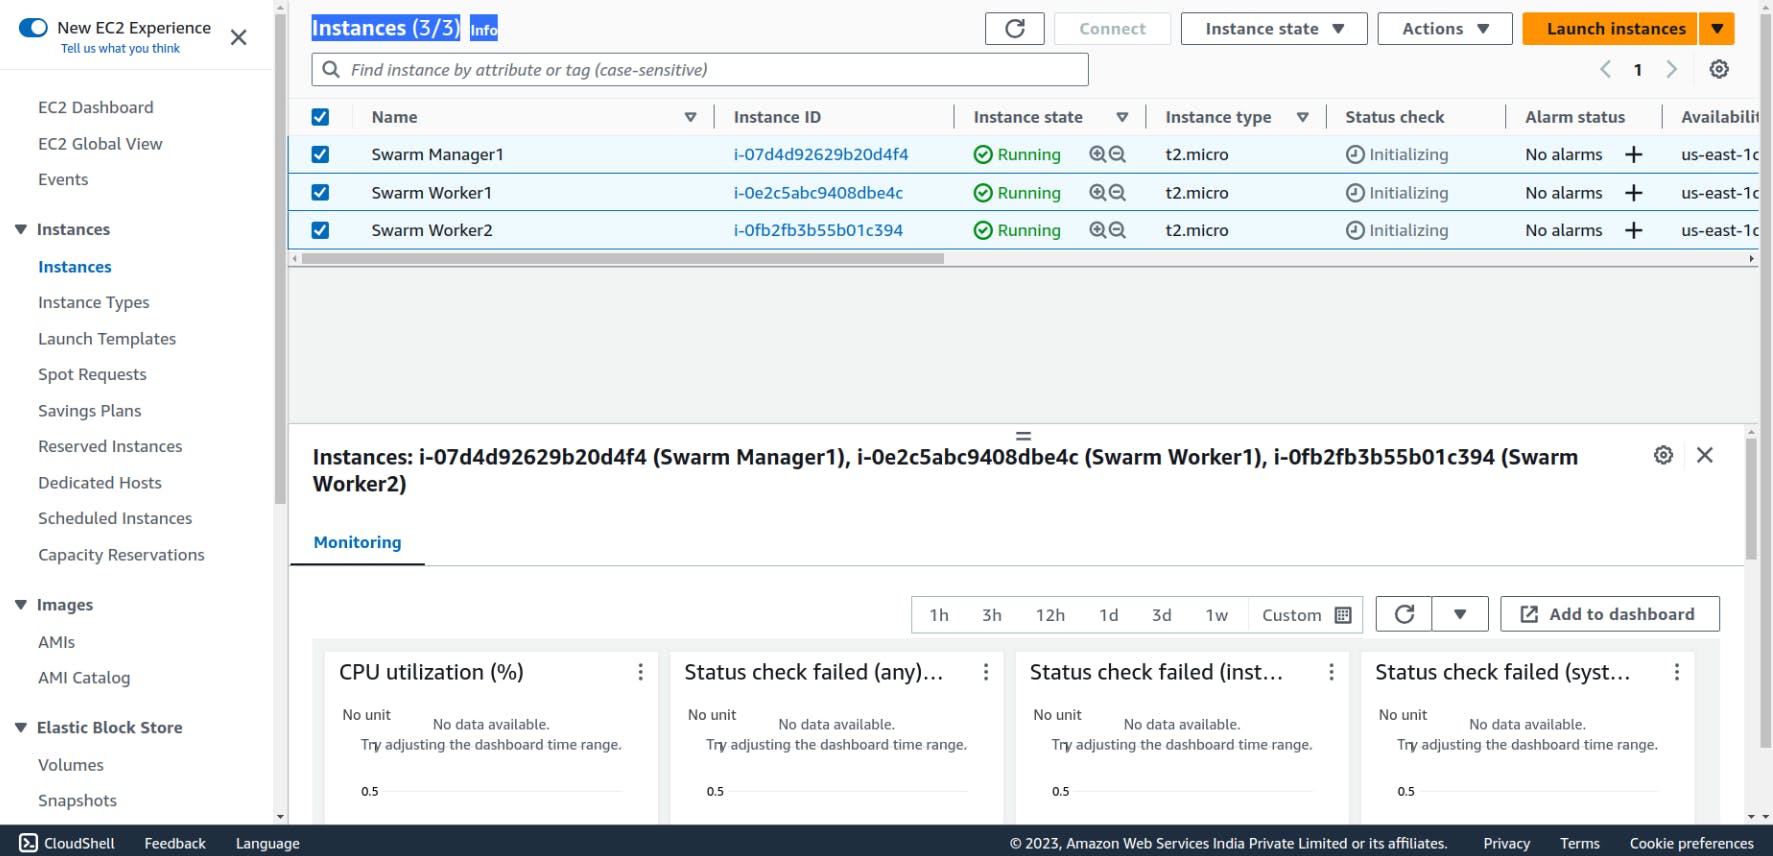
To start, access the AWS portal and set up three new instances with Docker pre-installed. Use the following shell script and provide it in the EC2 User Data field:
#!/bin/bash

echo "Docker installation"
echo "------------------------------------------------------------------"
sudo apt update
sudo apt install -y apt-transport-https ca-certificates curl software-properties-common
curl -fsSL https://download.docker.com/linux/ubuntu/gpg | sudo gpg --dearmor -o /usr/share/keyrings/docker-archive-keyring.gpg
echo "deb [arch=amd64 signed-by=/usr/share/keyrings/docker-archive-keyring.gpg] https://download.docker.com/linux/ubuntu $(lsb_release -cs) stable" | sudo tee /etc/apt/sources.list.d/docker.list > /dev/null
sudo apt update
sudo apt install -y docker-ce docker-ce-cli containerd.io
sudo systemctl start docker
sudo systemctl enable docker
sudo usermod -aG docker ubuntu
sudo reboot

Step 1: Set Up Docker Swarm Cluster
The first step is to set up a Docker Swarm cluster. If you haven’t already, create a Docker Swarm cluster by initializing it on a manager node. Use the following command on the manager node:
docker swarm init
Once the swarm is initialized on the “swarm-manager” node, a key will be generated to add additional nodes as workers to the swarm. Copy and execute this key on the remaining servers to join them to the swarm.
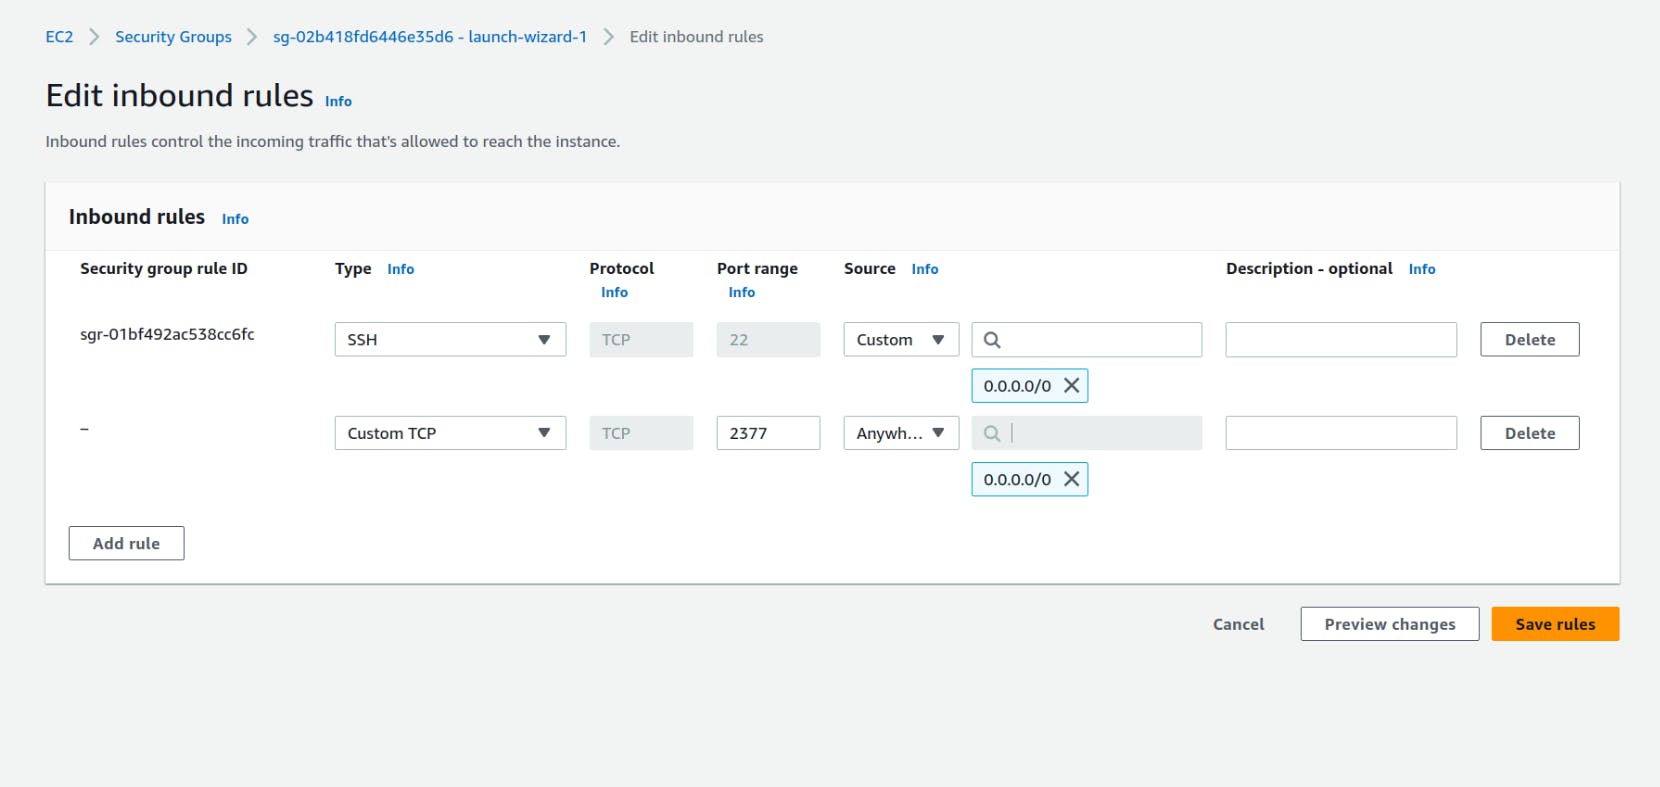
We can see Docker Swarm uses port 2377, so we’ll open this port in our Security Group.

To verify the connected worker nodes and manager nodes in the Docker swarm, you can use the command:
docker node ls
Step 2: Deploy the Web Application
With the Docker Swarm cluster ready, it’s time to deploy your web application using the Docker image stored on DockerHub. Use the following command to deploy the application as a service on the Swarm:
docker service create --name django-notes-app --replicas 3 -p 8000:8000 samsorrahman/django-notes-app:latest
Step 3: Verify the Deployment
Once the service is deployed, you can verify its status and check if the desired number of replicas are running on the Swarm nodes. Use the following commands to see the running services:
docker service ls
docker ps
Now, the service is running on all three nodes. To verify this, navigate to http://<ec2-instance-public-ip-address>:8000 using every instance IP Address.
- swarm-manager
- swarm-worker1
- swarm-worker2
Step 4: Clean-up
When you are done with the project, you can remove the service and leave the Swarm. To remove the service, use the following command from any worker node:
docker swarm leave
After removing one of the workers, we can observe its status as “down” within the status information.
To leave the Swarm, run the following command on the manager node:
docker swarm leave --force
Congratulations on completing Day 83 of the #90DaysOfDevOps challenge! We accomplished a significant milestone by deploying a web application using Docker Swarm. This experience has enriched our understanding of container orchestration and its role in modern DevOps practices. Tomorrow, get ready to level up as we dive into a new DevOps Project on Day 84. Stay tuned!
If you have any questions or feedback, feel free to leave a comment below. Thanks for reading and have an amazing day ahead!